Thursday, January 28, 2010

Logo's

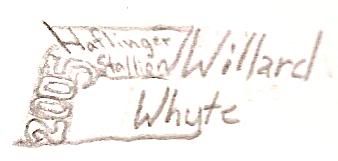
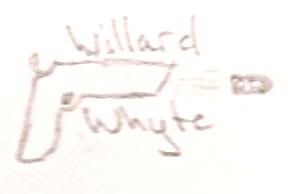
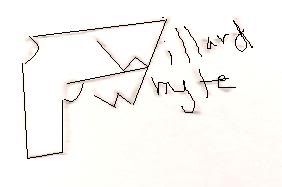
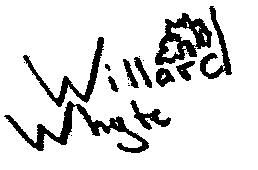
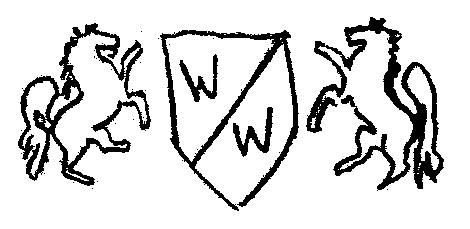
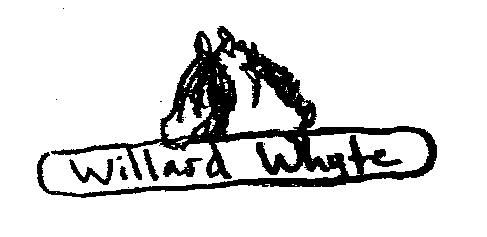
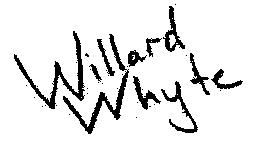
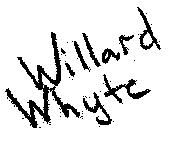
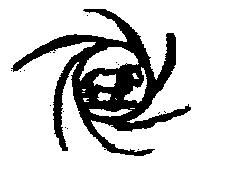
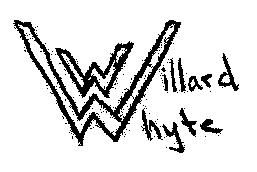
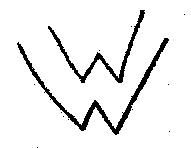
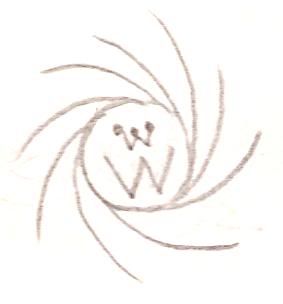
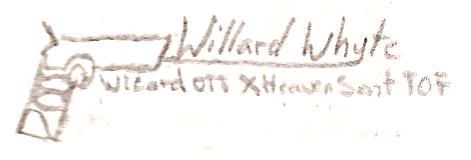
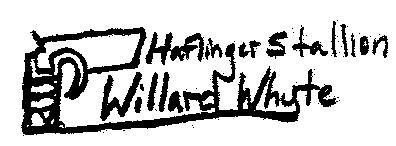
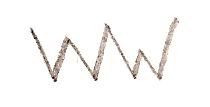
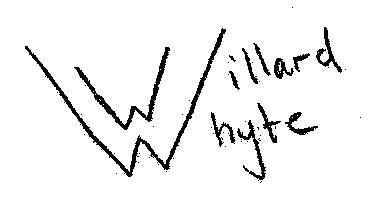
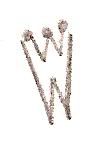
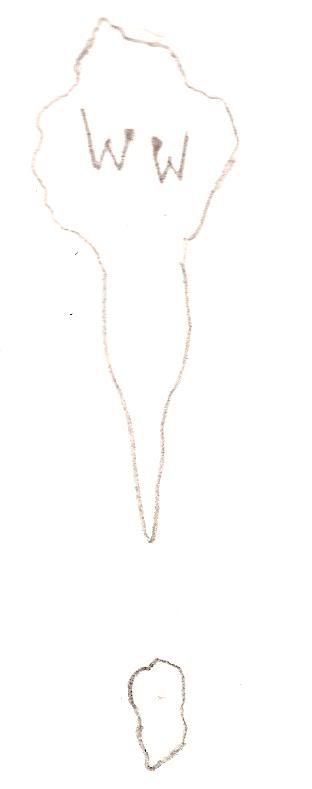
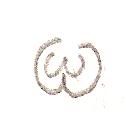
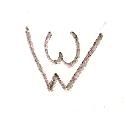
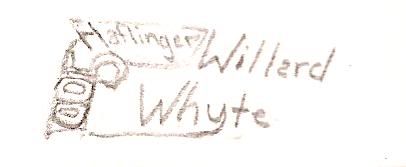
I have spent the last two nights trying to come up with a logo for Wynter. Seems stupid but I have seen the Arabians, Quarter horses and Paints have stallion logos and I thought Wynter needs one! I did all these by hand on my drawing pads and they are very very rough. I scanned them and destroyed them in the process. Thus what you see are only ideas! Once I get my lab top fixed I can use my Wacom and Photoshop and really work on these and make them pretty. So some are digitized because the scan obliterated them and some are straight scanning. If any one has any more idea let me know and I can post em here. I don't think I have ever wrote his name more than in the past few nights!

I got 31 so far....

1

Number 1

Number 2.... won't load I'll try later.

3

Number 3

4

Number 4

5

Number 5

6

Number 6 and the silly horse head drawing will be a photo of him not a drawing. Sorta looks like a dragon at the moment don't it?

7

Number 7 This one will be in color at least the sheild will be I think the horses wil be in complete black. Not sure though.

8

Number 8 again real photo not silly dragon horse flub!

9

Number 9

10

Number 10 looks like 9 but look again.

11

Number 11 The horse will be Wynter's out line like the real 007 logo.

12

Number 12

13

Number 13

14

Number 14

15

Number 15

16

Number 16

17

Number 17

18

Number 18

19

Number 19

20

Number 20

21

Number 21

22

Number 22 with or without the letters.

23

Number 23 with our farm logo in the middle.

24

Number 24

Number 25 won't load I'll try later.

26

Number 26 again will be a real photo not sure if I want it in color or just a black outline.


27

Number 27

28

Number 28

29

Number 29

30

Number 30

31

Number 31

Wednesday, January 27, 2010

Trail Ride

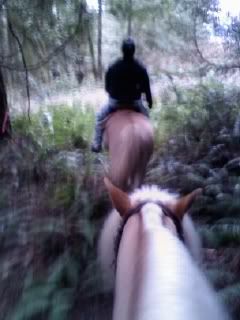
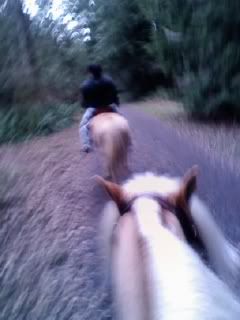
Today was a long day! Started out on the trails riding Marz and then half way through decided to go back to the barn and switch out horses. So around 2:00 I fetch Wynter from his pasture and lunged him in the round pen. Since Liz rode Arlo on our first ride we had to take Toccata with Wynter. I was a tad bit nervous with bringing a mare with him out to the tree farm with as many people as there was out there. After he was lunged (he got a few bucks out) we loaded the two. I made sure and put Wynter in the front (like always) and we put Tots in the very back.

At the trail head I left Wynter in the trailer for a second as Liz got Tots ready. After he stopped pawing for a few seconds I pulled him out and tied him on the opposite side. He was pretty excited, not being too stupid though. He was pawing here and there and he was yelling but he was much better than I thought he would be. I was pretty swift getting him tacked up. I think I was most impressed with him standing still as I mounted. With all the commotion I figured he'd dance but nope he stood and he even stood there as I adjusted so I was pretty proud.

We were quick to leave the parking lot just because I didn't want to hang around. We got a lot of compliments on his mane and there color. They are very very pale looking because I just body clipped both horses. I was also proud that he just went to work he wasn't overly thrilled to have a mare with him. So we left the parking lot with out a cheering squad. He was really good at the beginning a bit bouncy and tense and he wanted to talked to Toccata as she came up beside him. As the ride went one he relaxed more and more, he is such a 'pretty' boy though. Liz and I were comparing him to a Rualf Lauren underwear model. Eww I got Mud between my frogs! Ha ha ha. He hates the mud but went through every section with out fail. He'd just gave it this look and airplane ears.

The most eventful things that happened were close to the end of the ride. During the whole ride he never wanted to walk up any hill he always wanted to trot and when I pulled him back he would toss his head which he got a big smack for each time. By then Tots was in front of him and he was doing really well with that he was just nickering here and there form time to time. After we went up the big sand hill we started trotting and he was doing great. Then he spotted a cut up tree that a person had flipped on it's side so that they could use it as a mounting block. Wynter had to arc around that but kept going forward. Then we cantered the last long stretch and I was very happy with how he responded to me. He was very very good nice and straight I on the other hand need to get used to changing horses. Him and Marz have very different canters.

In the clearing he had to blow about the port O potty, that smelled funny. He wouldn't get close so after about 4 tries Liz took Toccata closer to it and he panicked for a second. He was like NOOOO it will eat you!!! Then when she nearly touched it he was like oh no I was just testing you. She was very very un-thrilled by his baby ness. Silly boy. Then as we were going back to the trailer he had to pull over to the side of the road. Yes he really did veer off of the main road to pee in the 'ditch' Liz and I busted up laughing. Then after about 20 steps he spooked. Like I have never seen him spook before. His whole body skidded sideways about a foot and then he just kept walking. It was very odd because there was nothing to spook over. Liz and I were making fun of him for it. Thus the reason I do not ride him with out stirrups. I do only ride with one hand most of the time, just hanging onto his reins with two fingers.

Other than that he was a rock star and I believe one of our longest rides we started out on the trails at 2:36 and came back at 5:00. I thought it was great for Wynter's brain it gets him out of the arena. Who else can take the baby stallion out on the trails with a mare?

Here are few blurry cell phone photos! Wynter's head and Liz on Toccata.

Trail Ride

Trail Ride

Sunday, January 24, 2010

Thursday, January 21, 2010

Fixing Shoulders

My Dad was over today fixing a few things in the arena with his lift. This lift is on a trailer on the back of his truck so it was pretty different looking. My grandfather was also out in the pen sitting in his truck. I figured it was a great bunch of new things to look at for Wyn. This will also be the first time that I ride him since the girls rode him the other day. Ohhh man let me tell you once I was on him he got him trouble. I sit on him and he is walking. Grrrrr. He knows better. So we back for about a mile, then stand there. After that I bring him over and let him look at the objects and he was really cool about them. He sniffed the lift which I thought was really brave of him. Then we were off to work.

Bending he was still ‘loose’ in his shoulders. Hard to explain really. He was not there like normal still showing the looseness of when the girls were playing around on him. So I kept him together the best I could as we went around the trucks and lift. When Dad left I actually parked Wynter in the middle on the pen and Dad drove around us going behind Wynter. The lift made the metal bouncing sound making Wyn’s ears flicker about. I had to pet him and tell him to stand still or he would have did the happy dance ad wheel around to look at it. He didn’t though and stood a little on edge but stood as they left the pen.

Now I had to shut the arena gate. I thought he would do this ok because he had done this before but he didn’t. I pull the right door shut and it scared him. Here was this door coming at him! He had to shy away from it. Petting him I got him closer but he was a bit shaken. I figured it was my fault by asking to much of him to soon. My mistake of assuming he could handle that. We did the usual get close then step away or step step and whoa and not whoa when I needed him to. After a bit he did get it shut but it just took longer than I figured. It was my fault and I got away from the gate as soon as I could I didn’t want to over do it.

The rest of the ride was a bunch of experiments. He is still off from the girls and I had fun trying to play with that. He lost his incredible straightness so I was striving to get it back. We did canter work and he diced to be a butt a few times. He rode out a few bucks and got the show back on the road again. At the end I really hadn’t got him that warm so I worked on the straightness issue. At first I was trotting up and down the arena hitting the side wall and turning around and hitting the other side wall. Wynter managed to ram him head into the wall twice. Then I was thinking about how to pick him up a bit and thought roll backs. Trotting roll backs.

He didn’t think these were fun in the slightest! What I did was use the rail and trot between letters. We’d trot to one letter then halt back up and ‘roll’ back turning into the middle on the arena and trot off then repeated. He didn‘t like then at all and threatened to rear on me once which got him into trouble. Man he is just being a rebel lately…. We did it a few more times until he was a little fluid. Then called it a night.
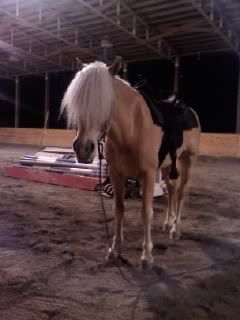
We worked on his ground tying a bit and I got some photos of him.

Wynter Face
Why mom why?

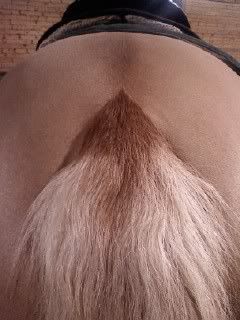
Body Clip mark
Kiss of the body clippers! Wynnies butt!

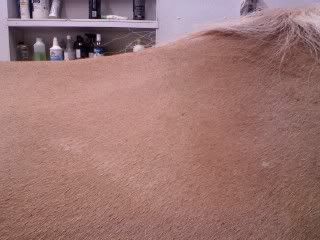
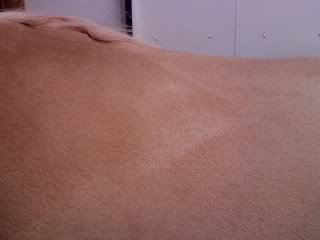
I also bright him in and un tack him while ground tied and was really impressed with him. He did good and stood still. I took some photos of his back I wanted to show you. I have never had any saddle fitting problems with him until now. He is slightly underweight as he does not like our current hay and I think that is the cause. I may be going off and buying him some grain so that he gets some fat on his top line. As you can see in the photos he is getting a shadow of a white mark.

Wyn Back Right

Wyn Back Left

Wednesday, January 20, 2010

Another rider....?

Today I let my cousin ride Wynter and she is not that experienced. I thought she could mange him but guessed wrong. He wouldn’t go for her with or with out spurs on. He wouldn’t go straight no matter what she did. She did get him to walk trot and canter but never in a forward straight manner. We tried and tried and after we got a bought of a good trot I jumped on him. It was like he had no shoulders. I’d add spurs and he was all over the place. It was amazing. I was stunned. He then tried to just lay into my spurs and he got jabbed for it. This made him buck and I jabbed him harder. He forgot who he was dealing with for a second! So I spent at least a half an hour trying to regain a shoulder. He would either lay into the leg or pop away from it. Talk about a huge step backwards. I have never been the type of person to decline anyone form riding my horses. I have never had any horse get ‘ruined’ but this took the cake. Maybe it was a stallion thing I am not sure but I don’t think she will be riding him any time soon.

He also couldn’t work with both spurs he could only think right using one. It was a lot of nitty gritty and a few moments where he would kick out and buck. More of less I had to make him go forward as he would shut down in a frame or position. It was irritating because I knew he could do it he just didn’t want to. I believe that he had got used to how my cousin was riding him and thought he didn’t have to do what he was told any more. Then I get on him and it is back to serious work. I rained on his parade and I am quite happy about that. Just the other day I had him at about 6 canter stride before we had to walk tonight I was doing 1 to 1 and a half before he fell apart. Not cool in the least. So we will see how he goes in the next few days. He improved drastically in the time I got on him but still a bit of.

Tuesday, January 19, 2010

Driving Trainer, Another Ride & Ground Tying

I think I am cursed. I swear. I can’t stop learning about horses. I just wished I had the money to get the lessons I want. I’d like to get more into dressage. That is easy enough just gotta get my but to my trainer. Then here I am online looking up driving trainers. I have been looking for a driving trainer for years. I swear there is no good quality driving trainers around. That is until I found a website. I have to do some research and email a few people about this place but it looks pretty safe. I’m actually pretty excited that I may have found a driving trainer. Wow, Wynter as a driving horse…. Super cool! I am super excited. Then there is this small problem called money. Training is one thing but a cart and harness is quite another all together.

Ok and I am certifiable if I even consider learning side saddle I swear. Imagine Wynters long mane and tail and him being shown side saddle! Ahh the romance of it…. Yup I’m nuts seriously nuts!

Today we just started with the basics. Lots of bending, I was trying to feel if his dentists appointment made a difference. Not really sure but I think it did. Now that I think about it I think it helped a lot actually. He was more relaxed softer in his mouth and he carried himself higher. He was still heavy on the right but that may not be just a teeth problem. Liz rode Toccata around so he had himself a nice distraction actually so did I. I kept an eye on her and Tots and kept yelling out pointer here and there so I was pretty distracted.

We bent for a long time going right left inside outside bla bla. Cookie cutter routine stuff. Then we trotted going between sitting and posting trot. I pulled a few of the poles down before we started and took him over a few trot poles here and there. He is getting a lot better about mentally handling them. Before he would get flustered and loose his rhythm and stride. Now he is getting a bit more control and able to go over them and maintain a frame and rhythm. That made me happy.

Our canter work was also pretty good. I just need to ride him more and we wouldn’t be stuck doing the same thing every single time. Again cookie cutter stuff. We started with the left side. He was good I tried to keep the head popping to a minimum which he tolerated well. The going right is still an adventure. Today he tried to ignore the inside rein and just blow through it which he got into trouble for. He got backed off of it and check hard a few times, just a reality check here and there. We also went around 5 stride instead of 3 or 4 just because he was holding his head and neck up a lot better than before. Not sure how teeth cam make that much of a difference but it seems like it did. He was very up not to the point of being a saddle bred but more so to a lazy classic style Arabian pleasure horse. A lot better than check his whole head and neck up.

After we cantered we had to help Liz. This took a while. I parked Wynter near a jump and gave Liz a lesson on Tots. Am I ever glad I chose to ride Wyn. She was a pain in the you know what! I was very impressed with her say… vigor. Liz and her had an all out War for the canter tracking right. Very entertaining. I try and make my lessons fun and we usually laugh while we are having a hard time and today was no different. As Toccata acted like a crab we were laughing. Wynter wasn’t sure what was going. He stood like a gentleman the entire time. Well, I take that back. I have a bad tendency of ‘ghost’ riding while sitting on another horse. I was adding spur where Liz needed to add spurs so Wynter moved a few times because of that. It was entirely my fault and he knew it was because I wasn’t paying attention. He just took a step and looked at me like get the spur out of my side unless you want to go to work.

I was pretty happy with Wynter tonight. He is such a worker. He only nickered at Tots 2 times and got in trouble for them. At the end of the ride he would giver her the puppy dog look but not talking. After Liz had her war I made him do a few more canter transitions. I admit I was being a bt mean to him. We sat there for a long time watching Liz and then I ask him to canter. If it was Arlo he would have got pissed. Wynter on the other hand is a trooper and just said ok if you insist.

Since he pooped one in the pen and we pick all of our manure from the arena I rode him to the bin in the middle of the pen. I picked up the pitch fork while I was on him. He did not think that was a neat idea in the least. He did not freak out but he was very skeptical in Wynter’s special way. Not flighty just ‘tender’. He had to step away from it a few times and when I asked him to walk straight he wasn’t sure if he like the hovering object following him. He kept and ear on it the entire time. Then when we reached his pile I slowly set it on the ground and leaned the handle on his shoulder. This he could have cared less for which I was glad. I’d like to be able to pick the pile while staying mounted like I can with Marz but he needs a bit more confidence before I go shaking sand out of the scary fifth limb.

For fun because it was something Marz taught herself I thought it would be fun to teach the stallion how to ground tie. Yeah because that is something people do with there stallions all the time right! I had already threw his right rein on the ground while I picked up his mess. Thus I just extended it and walked back to the bin. I got half way there when he had to turn and try and follow me. I don’t think he ever expected to get in trouble for following me. I turned around shanked him back and put him back in the same spot in the same position that he started in, saying WHOA. Walking away he turned, more or less did a fore hand turn but he stayed. I went back grabbed him and lead him toward the next pile he had left and did the same thing. Again he had to turn I just said WHOA and he stopped. We did this several times making sure I said WHOA very clearly after I made a big deal out of the reins being dropped on the ground. I think about 5 times and he had it pretty mastered even with Toccata standing oh so vulnerable 8 feet over. He s such a good boy. Love him love him love him!

Tuesday, January 12, 2010

Tails

Well, I have been asked on many occasions how I get my tails so long. I have written several articles and decided to do a little tail demo here for everyone to read. First I will go over our list of supplies….

1. Hair Brush (may sound simple but is pretty important!)

2. Detangle-er (now this is controversial. I like to use Laser Sheen or Cowboy Magic. A lot of people use Show Sheen I don’t. Here is why, I have read where silicone can dry out and weaken hair and Show Sheen to my knowledge has silicone in it. Thus my main point being look that the ingredients in your detangles and avoid any with Silicone.)

3. Rubber Bands ( Try and get the little small ones that you use for rings. Any color and brand works for me. I tend to get white with the Haflinger’s)

4. Oil (I like to use Vegetable oil, but have used peanut, canola and soy. I have yet to see any real difference between the types.)

5. Tex Guard (there is a reason I put down a brand name. I do NOT use VET wrap or anything of the type. Vet wrap stains, sticks to hair and does not breath. Tex guard, doesn’t stain only sticks to itself and breaths. My farrier and I had a light hearted debate over the two and the only thing that vet wrap had going for it was its price, fun patterns and stretchiness. Overall Tex Guard won… in my opinion. I believe my farrier thinks he won!) The best place to find Tex Guard is sstack.com.

The first thing you do is wash the tail. I wash our tails about 4 times with shampoo, do our bluing and oxy clean to get them white and then let them soak in conditioner for at least 5 minutes if not more. Then after it is super conditioned I rinse it out and let it dry. This is very very important that you let it completely dry. This brings me back to why I do not like to use vet wrap. I have seen tails rot out due to moisture from either being wet and wrapped or from the oil. Just make sure the tail is dry I blow dry mine.
Photobucket

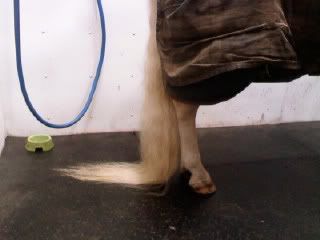
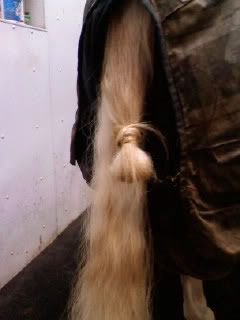
After it is dry I brush it completely out like the photo above. This is Wynter’s tail after being up for several months and I didn’t use and whiteners on it I just washed it 3 times and conditioned it. Its very yellow in my opinion. Then I take the brush and on each side on the tail up by his butt I brush to the side bring the edges in. I then brush side to side in the middle. Basically what I am doing it getting the top coat. This top layer is more important that you think. If you just shove all the hair in the wrap when you undo it and let the tail down there is a definite ‘wrap’ line. You can tell what hairs were in the wrap and what were not. This top layer is your blender, it helps blend the everything together making it look natural. It also works as a ‘mini’ tail that they LOVE during the summer. With the Haflinger they have so much that you can get that layer pretty thick and it looks like there tail is not wrapped at all. It you pull out long bits from the edges or the middle that it fine. Don’t pay much attention to the length as to the evenness. You want this layer to be even front the right to the left. For Wynter because his is so long I will have to cut about 3 inches off when we are done. The photo below shows the top layer rolled up and wrapped around its self. The point being put it up and away somewhere, that way you won’t be constantly pushing it away or accidentally getting those hairs involved with the rest of the tail.
Photobucket

Once the top coat is in a safe place and out of the way and secure, (use a rubber band hair tie or even a hair clip) then you braid. Every horses tail is different in thickness. With Appy’s they have very very thins tails (I’m speaking majority here) thus they can shove all that hair in one wrap and be fine. Now the longer the tails gets the more hair you are putting in that wrap. This also goes for the thick Haflinger tails. Imagine putting all that hair in one wrap. It is just way to much hair for the oil to work right and it is also pretty heavy and bulky. Thus for most of our Haflinger’s I have to use two wrap although a few are ready for three. This means instead of braiding only one brain you need to do two. For Wynter I am using two. I split the main body of his hair in half. I then braided one shown below.
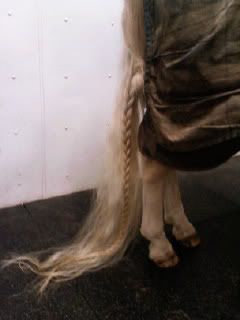
Photobucket

After that one was braided I braided the other section of hair shown below.
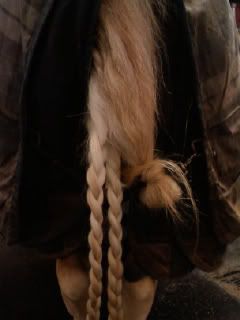
Photobucket

After they are braided I add the oil. The point of the oil is to keep the tail hydrated while in the wrap. Don’t drench the poor things I does not need to be soaking wet. I like to pour the oil into the middle of the braid. Shown below with a red line. I go all the way down and dabble a bit at the ends as well.
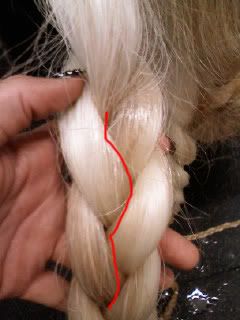
Photobucket

Finely braided and Oiled I roll it into a sort of rectangle. Almost like a long lolly pop or swirl shape. The shape in which you roll or fold the braid into will be the final shape of the finished wrap. Wynter’s are a little longer than I would like but I had to do then this long because his tails is so thick. If I did them shorter they would have been much fatter. He really needs three wraps to have them balanced the way that I like.
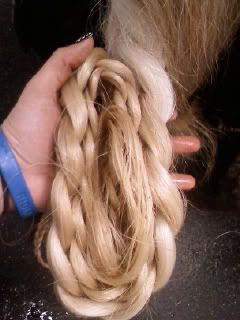
Photobucket

After they are wrapped I place a rubber band around eth middle of it so it is easy to handle. It just keeps it in place so that it isn’t unfolding and causing your to juggle.
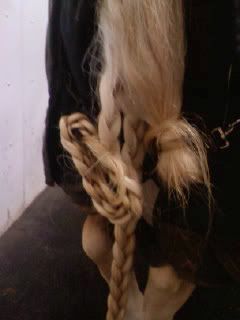
Photobucket

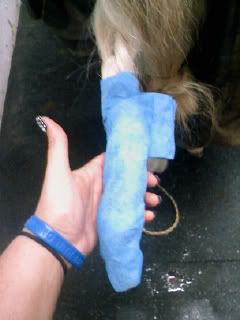
Now for the objective part of the whole thing. I am going to show you how I wrap the Tex Guard. Everyone will need to learn there own style. My trainer does hers quite differently. On another note each horse is also different. Some require pretty inventive ways to keep it on while others may not require so much ‘armor’. This is how I do it for the majority of our Houdini Haflinger’s. They still tend to get them out form time to time. So if you go out into the barn after only a week and find that nice white clean tail draping n the soppy mud well you know to be a little bit for creative with your wrapping next time. Don’t give up! Trust me I have been through MANY rewraps. I start just under the spot where the roll goes in and down.
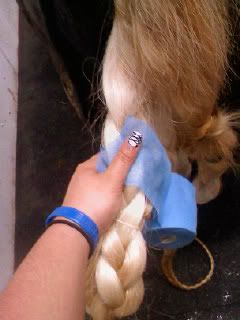
Photobucket

I then wrap it all the way around. Note that the first it pretty tricky as it is slipping around. Also try and get it snug if you press it on loosely it will only spin around the tail. You want it to be like a vacuum seal wrap.
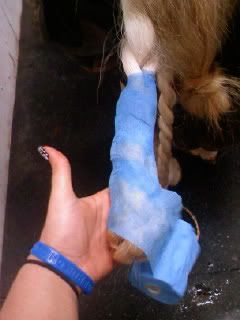
Photobucket

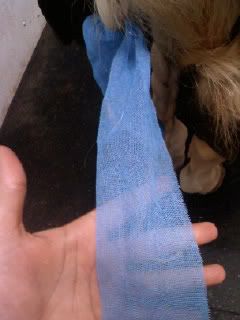
Once I get it looped around once I start a spiral downwards.
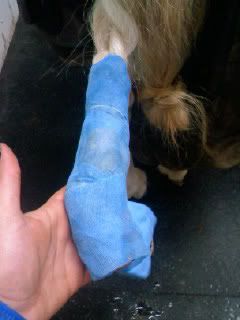
Photobucket

When you hit the end do not swoop down and around rather keep up with the spiraling. Spiral it down past the edge so that you have almost half of the wrap width hanging off the end. Here is a photo of the bottom on the tail. You can see that it is still open at the end.
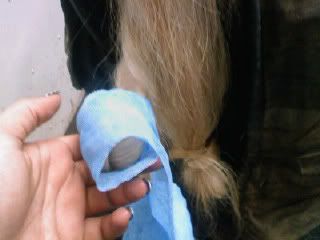
Photobucket

Then spiral back up the wrap.
Photobucket

Because we started under the ‘knob’ where the roll starts you will have to wrap over that. I do it two times around just so it is thick. (Haflinger’s… you know.) Here is a photo to give you an idea of what I am talking about. A lot of people are confused on this part.
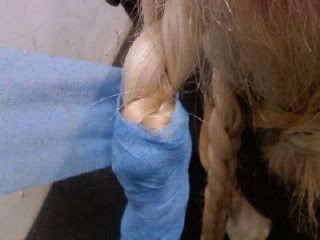
Photobucket

Here is a photo of it wrapped up. See how it is pressed in. There will be a bit of a bump there and that is perfectly normal.
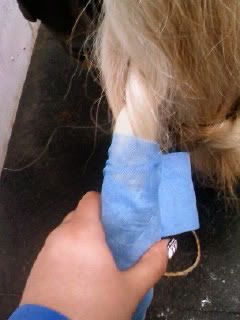
Photobucket

With the wrap looking done come my interesting technique of Haflinger proofing it. I roll out the length of the tail or at least all the way to the ground and the tare or cut off the roll of Tex Guard. Thus you now have a streamer. Look Wynter is relaxing. He wasn’t quite sure why this was taking so long!
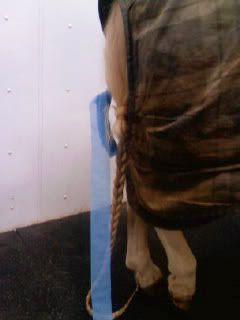
Photobucket

Putting my finger through the middle of the braid just above where your wrapped tail is. See photo….
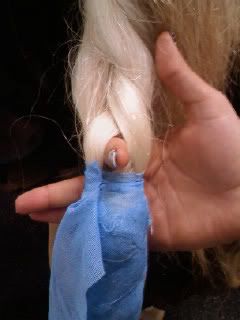
Photobucket

I then push the streamer through this hole.
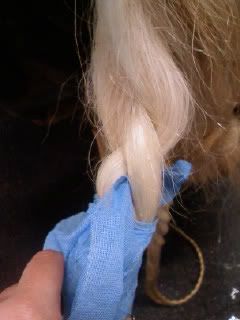
Photobucket

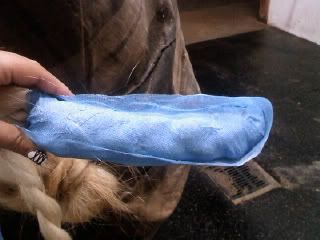
You will notice that the wrap will fold in on its self. This is the pain in the butt part. You have to flatten the top half out. Fun very fun. It should look a bit like this. This is important as you will be covering you the wrap with this giving the wrapped tail an extra layer of protection.
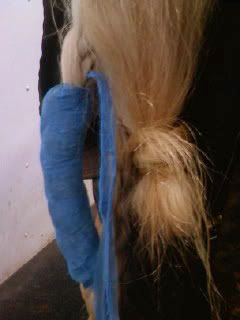
Photobucket

Photobucket

With the wrapped tail on its side I lay the streamer down.
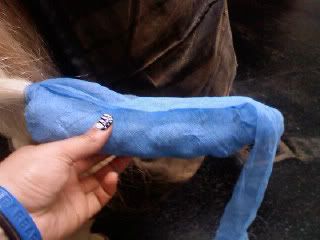
Photobucket

I loop it around like so….
Photobucket

Then press.
Photobucket

The remaining streamer will then be back at the top. This is where you do the process over again. Do not use the same hole you put the fist one through. I like to do opposites. Think of the wrapped tail as a cube. You have four side and all four side need to have a wall of extra protection. So the second pass I move over so, that it covers the strip that I missed with the first loop. Here is a photo of the wrap with the first loop. I added a black line to that you can see the edges of where the wrap ended. You will run the extra length of streamer so that it covers that hole.
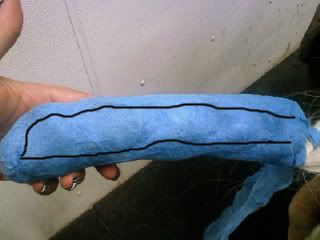
Photobucket
I like to make an X at the top of the tail. Here is my finger through the braid yet again this time at a different angle. Can you see how the other loop is going side to side and I am crossing over it with this loop?
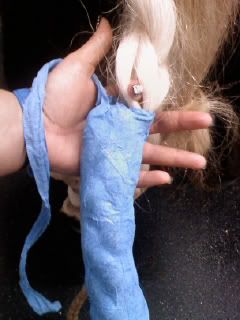
Photobucket

Photobucket

Down and around yet again….
Photobucket


Photobucket


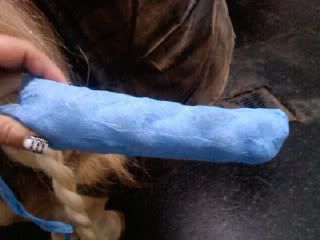
Tada! Tail is wrapped! Now because I have Haflinger’s I like to add rubber bands around the whole thing to keep it together. I just do this for more armor so to speak you don’t have to if you don’t think it is necessary. Now it the moment where you can see if you have it too thick. To thick and you will have a hard time placing the bands around without them breaking.
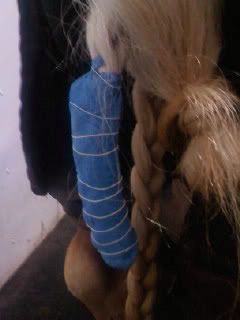
Photobucket

If you have to do two, your finished product will look like so….
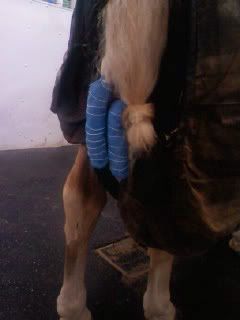
Photobucket

Now just pull the top layer out and you are done… that is unless you have a long tail like Wynter here then you have some extra steps.
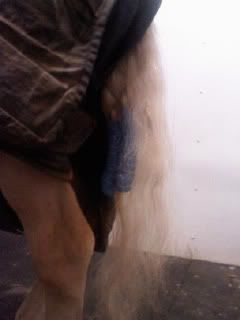
Photobucket

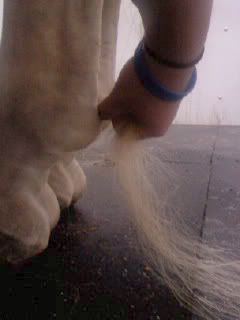
Pulling the tail straight down to the fetlocks. If it is around this area don’t cut it but if it is like Wynter I wuld suggest cutting it. Cutting it is far better than having then having them step on it and pull the whole strand out. A few inches at the end is better than 5 foot.
Photobucket

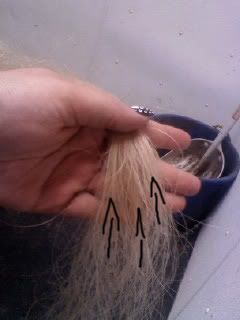
A trick for a natural looking tail is to cut up. I added arrows to the photo below so that you can see what I mean. If you cut straight across you are going to have a very fake manicured look that will not blend with the tail when it is down. It is also hard to get a straight cut level. Thus I cut up ensuring optimum blend.
Photobucket

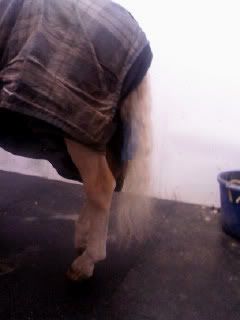
Here we are after 3 inches of tail he has a great tail wrap and top layer.
Photobucket

Now that your horses tail is wrapped how long does it stay in or when do you need to wrap it? Luckily I have several horses in my barn to show you some of the indications of when you will need to re wrap the tail. First and foremost they can stay in for as long as you can leave them in with out them falling apart.
Photobucket

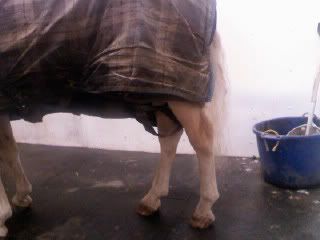
Below is one of our mares. She has had these in since June 09 and it is Jan 12 10. They do not need to be done at this time. They are fine for at least another month. Look how pretty they get! If you had to do two wraps in one tail and only one of the wraps needs to be redone, re do the whole tail do not try and do just the one section. It is just a headache and more bother than it is worth.
Photobucket

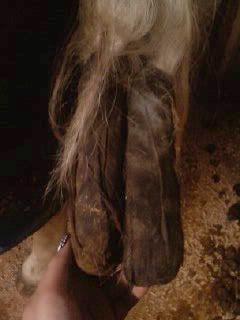
Here is a mare that needs her tail redone. See how the bottom of the wrap is ripped? If this is not redone there is the possibility of her catching it of an object and chopping that much of the tail off. Trust me… I know this from experience. Another thing is that once the ‘seal’ so to speak is broken, dirt and shavings like to settle inside. It can also dry out the hair.
Photobucket

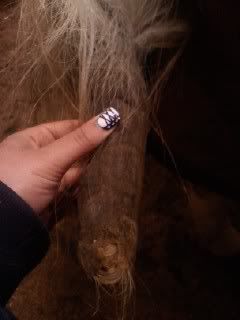
This mare has two things going against her. First is the fact that her wrap is quite latterly falling off of her. See how it has slipped down?
Photobucket

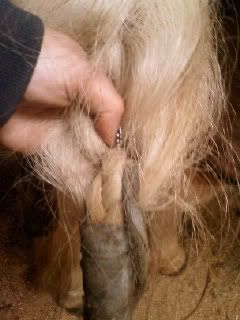
On another note the same tail is super long. I love it when this happens! When we first wrap them we start the braid just below the tail bone. My thumb is on the bottom of her tail bone. Since I have wrapped her tail she has grown about four inches. This is always exciting! You can literally see how much there tails has grown since you have put it up. Most of the time the wrap will all apart before you have to check the length. Although some like this mare grow and outrageous amount of hair and you will need to watch that it does not get to long. I don’t like my wraps to hang to low. When they are low they are susceptible to being caught and ripped out by something.
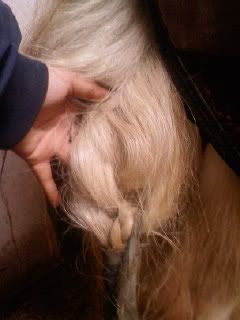
Photobucket

My last point is when to start wrapping. Below is a photo of our yearlings tail. I don’t start wrapping tails on our Haflinger’s until they reach two or at least go to there fetlocks. My main reasoning behind this is that the foals need to learn what the tail feels like. I have had horses who kick at there tail because they have no idea what it is. This may be something that you want to remember if you have a horse who has never had a long tail. They can and may kick out at it when it is down. I had one of my mares kick at her after it was up for a long period of time. They are not used to the tickling.
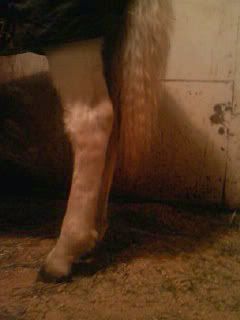
Photobucket

Bets of luck and may your tails grow!
Related Posts with Thumbnails